Master the Art of Boiling Corn on the Cob: A Step-by-Step Guide for Perfectly Tender Kernels
Boiling corn on the cob is a classic and delicious way to enjoy this summer staple. Whether you're hosting a backyard barbecue or simply craving a taste of nostalgia, mastering the art of boiling corn on the cob will ensure perfectly tender kernels bursting with flavor. In this step-by-step guide, we'll walk you through the process from selecting fresh corn to serving up a mouthwatering dish that will have everyone coming back for seconds. So grab your apron and let's get started!
Step 1: Selecting fresh corn
When it comes to boiling corn on the cob, selecting fresh and high-quality corn is crucial for achieving the best flavor and texture. Here are a few tips to help you choose the perfect ears of corn:
1. Look for bright green husks that are tightly wrapped around the corn. Avoid ears with brown or dry husks, as this indicates that the corn is past its prime.
2. Gently feel the kernels through the husk to ensure they are plump and firm. Avoid ears with soft or shriveled kernels, as they may be old or dried out.
3. Check for any wormholes or brown spots on the husk, as this could indicate insect damage or mold.
4. It's also important to choose ears of corn with fresh-looking silks at the top. The silks should be slightly sticky and moist, indicating that they were recently harvested.
By selecting fresh corn, you'll ensure that your boiled corn on the cob has a sweet and tender taste that will delight your taste buds. So take your time when choosing your ears of corn, and enjoy the rewards of using only the best ingredients in your cooking.
Step 2: Preparing the corn for boiling
Before you start boiling the corn on the cob, it's important to properly prepare it. Follow these simple steps to ensure that your corn is ready for cooking:
1. Husk the corn: Start by removing the outer husks of the corn. Peel away the green layers until you reach the tender kernels. Remove any remaining silk strands as well.
2. Rinse the corn: Give the corn a quick rinse under cold water to remove any dirt or debris that may be stuck to it.
3. Trim the ends: Use a sharp knife to trim off any excess stalk or stem at both ends of the cob. This will make it easier to handle and eat later on.
4. Optional step: Soak in water (optional): Some people like to soak their corn in cold water for about 15 minutes before boiling. This can help keep the kernels moist during cooking, but it's not necessary.
By following these preparation steps, you'll ensure that your corn is clean and ready for boiling. Now let's move on to the next step - actually boiling the corn on the cob!
Step 3: Boiling the corn on the cob
Once you have prepared the corn, it's time to start boiling. Fill a large pot with enough water to fully submerge the corn cobs. Add a pinch of salt to enhance the flavor.
Place the pot on the stove over high heat and bring the water to a rolling boil. Carefully add the corn cobs into the boiling water, ensuring they are fully submerged. Reduce the heat to medium-low and cover the pot with a lid.
Allow the corn to simmer for about 10-12 minutes. The exact cooking time may vary depending on the size and freshness of your corn. Be careful not to overcook as this can result in mushy kernels.
During cooking, occasionally check that there is enough water in the pot to keep the corn submerged. If needed, add more hot water.
Remember that it's essential not to overcook or undercook your corn. Overcooked corn will be mushy, while undercooked corn will be tough and chewy.
Once cooked, carefully remove each cob from the pot using tongs or a slotted spoon. Place them on a plate or serving dish lined with paper towels to absorb any excess moisture.
Now that you have successfully boiled your corn on the cob, it's time for Step 4: Checking for doneness.
Step 4: Checking for doneness
Step 4: Checking for Doneness
To ensure perfectly tender kernels, it is crucial to check if the corn on the cob is cooked to perfection. Gently insert a fork or knife into one of the kernels. If it easily pierces through and feels tender, your corn is ready. However, if it feels hard or undercooked, continue boiling for another 1-2 minutes and check again.
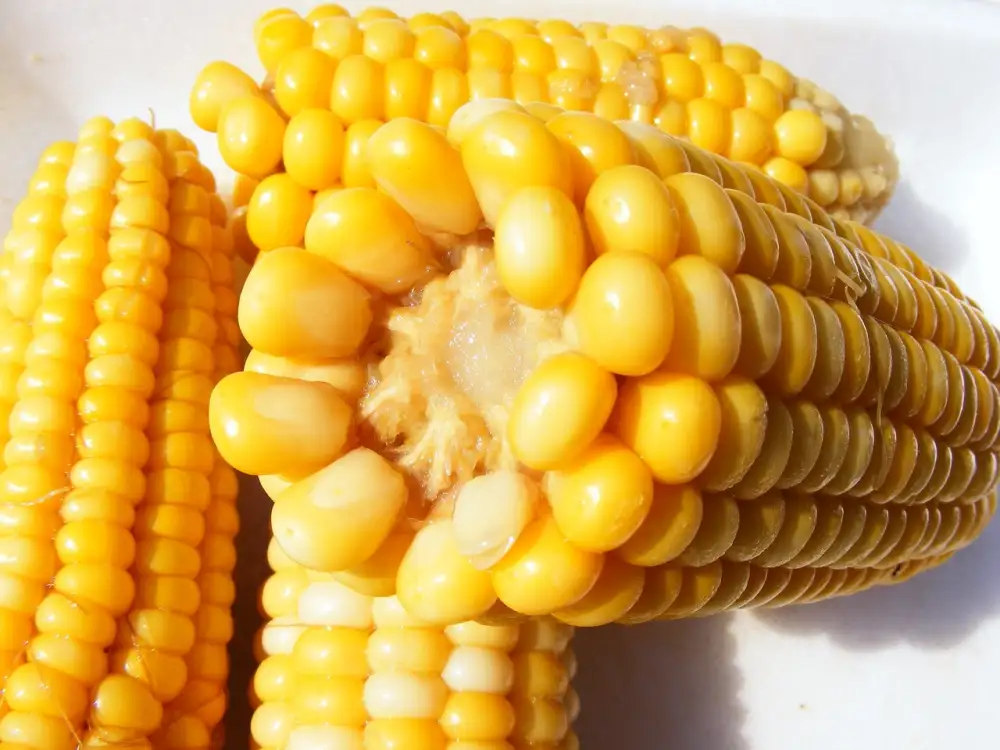
Another way to check for doneness is by observing the color of the kernels. When properly cooked, they should be bright yellow and plump. If they appear pale or shriveled, give them a little more time on the stove.
Remember not to overcook the corn as it can become mushy and lose its natural sweetness. Keep a close eye on the cooking time and test frequently to achieve that perfect balance between tenderness and crunchiness.
Once you are satisfied with the doneness, remove the corn from the boiling water using tongs or a slotted spoon. Allow any excess water to drain off before serving.
Step 5: Serving and enjoying boiled corn on the cob
Once the corn on the cob is perfectly cooked, it's time to serve and enjoy this delicious treat. Using tongs or a slotted spoon, carefully remove the corn from the boiling water and place it onto a serving platter.
To enhance the flavor, you can brush melted butter over each ear of corn. Sprinkle some salt and pepper for added taste. If you prefer a bit of spice, consider adding chili powder or paprika.
Corn on the cob is often served as a side dish at barbecues, picnics, or summer gatherings. You can also pair it with grilled meats or seafood for a complete meal.
To eat the corn on the cob, hold it by one end and start nibbling away at the kernels. It's customary to rotate the cob as you go along to ensure even consumption. Be careful not to bite too close to the cob as it may be hot.
Remember to have plenty of napkins on hand as eating corn on the cob can get messy! Enjoy every juicy bite of sweet and tender kernels.
Serving boiled corn on the cob is a simple yet satisfying way to enjoy this classic summer vegetable. Whether you're hosting a backyard barbecue or having a cozy dinner at home, this versatile dish will surely be a crowd-pleaser.
Tips and variations for boiling corn on the cob
1. Add flavor: Enhance the taste of your boiled corn by adding a few ingredients to the water. Try adding a tablespoon of sugar or a splash of lemon juice to the boiling water for a hint of sweetness or acidity.
2. Experiment with seasonings: After boiling, brush melted butter onto the corn and sprinkle it with salt and pepper for a classic flavor. You can also try sprinkling chili powder, garlic powder, or grated Parmesan cheese for an extra kick.
3. Grilling option: For a smoky flavor, consider grilling your corn on the cob instead of boiling it. Simply soak the husked corn in water for 15 minutes, then grill over medium heat for about 10-15 minutes, turning occasionally.
4. Creamy corn: If you prefer a creamier texture, try simmering the corn in milk instead of water. This method adds richness and depth to the flavor.
5. Corn salads: Boiled corn on the cob can be used as an ingredient in various salads. Cut off the kernels and mix them with other vegetables like tomatoes, cucumbers, and onions. Toss with dressing or vinaigrette for a refreshing side dish.
6. Leftover ideas: If you have leftover boiled corn, don't let it go to waste! Cut off the kernels and use them in soups, stews, casseroles, or even as toppings for pizzas and tacos.
Remember to always choose fresh corn and adjust cooking times based on personal preference for tender or crisp kernels. With these tips and variations, you can elevate your boiled corn on the cob to new levels of deliciousness!
In conclusion, mastering the art of boiling corn on the cob is a simple yet rewarding culinary skill. By following these step-by-step instructions, you can ensure that your corn kernels are perfectly tender and bursting with flavor. Remember to select fresh corn, prepare it properly, boil it for just the right amount of time, and check for doneness before serving. With these tips and variations in mind, you can elevate your boiled corn on the cob to new levels of deliciousness. So go ahead, gather your ingredients, and get ready to enjoy this classic summer treat!
Published: 22. 11. 2023
Category: Food